
Why a Countertop Herb Garden Setup Beats Store-Bought Every Time
A countertop herb garden setup gives you fresh basil, mint, parsley, and more — right on your kitchen counter, year-round, no yard needed.
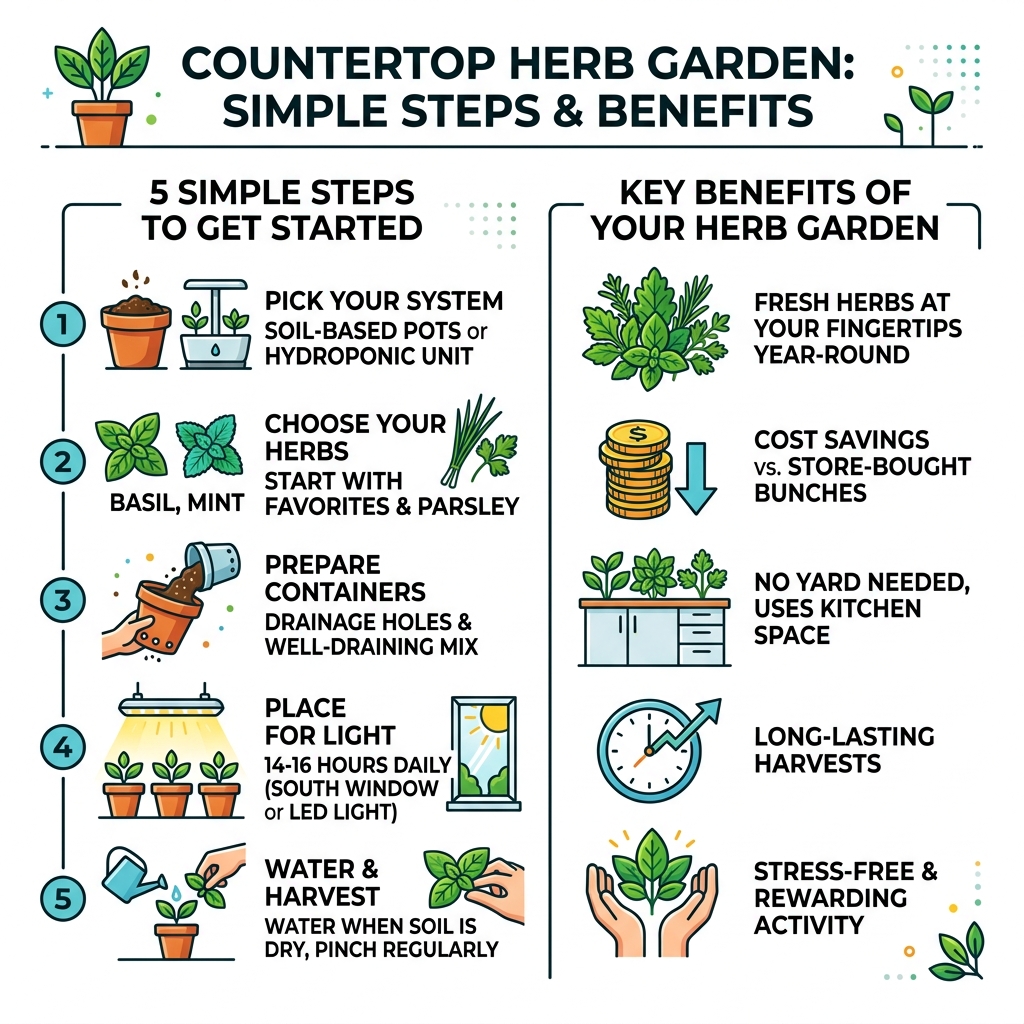
Here’s how to set one up in 5 simple steps:
- Pick your system — soil-based pots or a hydroponic unit like AeroGarden or Click & Grow
- Choose your herbs — start with basil, mint, chives, or parsley
- Prepare your containers — use pots with drainage holes and a well-draining potting mix
- Place for light — a south-facing window or an LED grow light for 14–16 hours daily
- Water and harvest — water when the top inch of soil is dry, and pinch herbs regularly to keep them growing
Sound too simple? It kind of is. Most people who struggle with indoor herbs are tripped up by just two things: too little light and too much water. Fix those, and you’re 90% of the way there.
Grocery store herbs cost $3–5 a bunch and often wilt before you use them all. A single potted herb starter, by contrast, can yield harvests for months — and costs about the same. That’s a hard deal to pass up.
Whether you’re a total beginner or you’ve killed a “can’t-kill” plant before (it happens), this guide walks you through everything — from picking the right container to your first harvest.
Choosing Your Countertop Herb Garden Setup
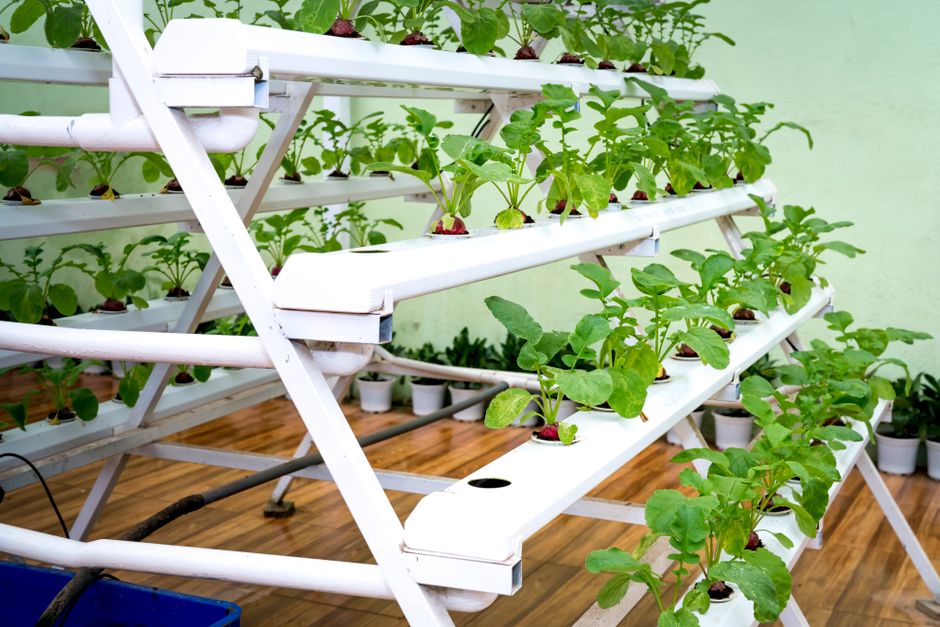
Before you get your hands dirty, we need to decide which “engine” will power your kitchen garden. There are two main paths: the traditional soil-based method and the modern hydroponic system. Both have their charms, but your choice depends on how much “hands-on” time you want to spend.
Selecting the Right Containers
If you choose the soil route, the container is your herb’s home. We recommend pots that are at least 4 to 6 inches deep. For herbs with longer taproots like cilantro or dill, aim for a depth of 12 inches.
Material matters more than you might think. Terra cotta is a fantastic choice because it “breathes,” allowing moisture to wick away and preventing the dreaded root rot. However, if you’re the type to forget watering, glazed ceramic or galvanized steel might be better as they retain moisture longer. Regardless of the material, ensure your pots have drainage holes every 3-4 inches. Always place a saucer underneath to protect your beautiful countertops from water damage. For more specialized advice, check out our guide on container-planting-for-herbs.
Hydroponic vs. Soil-Based Systems
Hydroponic systems, like those from AeroGarden or iDoo, are the “Keurigs” of the plant world. You drop in a pre-seeded pod, add water and nutrients, and plug it in. These systems use a soilless medium (like peat or coco coir) and nutrient-rich water. Research shows that hydroponic Deep Water Culture (DWC) can yield up to 20% more herb biomass than traditional soil methods because the roots have direct access to oxygen and minerals.
Soil-based systems are more traditional and often more affordable. They require a high-quality indoor potting mix—never use outdoor garden soil, which is too heavy and may harbor pests. For a breakdown of the best kits to get started, see our indoor-gardening-kits-for-beginners.
| Feature | Hydroponic System | Soil-Based Container |
|---|---|---|
| Growth Speed | Fast (Basil ready in 3-5 weeks) | Moderate (4-6 weeks) |
| Maintenance | Low (Automatic lights/alerts) | Moderate (Manual watering) |
| Initial Cost | Higher ($70 – $150+) | Lower ($20 – $50) |
| Mess Factor | Very Low | Moderate (Soil handling) |
To help you visualize your space, we have compiled indoor-herb-garden-layout-tips to ensure your setup looks as good as it tastes.
Best Herbs for Your Countertop Setup
Not all herbs are created equal when it comes to living indoors. Some thrive in the cozy confines of a kitchen, while others (looking at you, Rosemary) can be a bit more temperamental.
Top Herbs for Beginners
If this is your first countertop herb garden setup, we suggest sticking to the “Fantastic Four”:
- Basil: The king of indoor herbs. It grows incredibly fast and loves the warmth of a kitchen.
- Mint: Nearly unkillable. Just keep it in its own pot, as it likes to take over everything else.
- Chives: These are very forgiving and grow back quickly after you snip them for your baked potato.
- Parsley: A bit slower to start but very hardy once established.
For a deeper dive into these varieties, read about the best-herbs-to-grow-indoors and easy-herbs-for-beginners-to-grow-indoors.
Companion Planting for Kitchen Gardens
Herbs have “personalities” regarding water. To make your life easier, group herbs with similar needs together.
- The Moisture Lovers: Basil, cilantro, and parsley enjoy consistently damp (but not soggy) soil.
- The Sun-Drenched Mediterraneans: Rosemary, thyme, oregano, and sage prefer to let their soil dry out completely between waterings.
Grouping these correctly prevents you from overwatering one while underwatering the other. Get more beginner-friendly-herb-garden-ideas to help you plan your groupings.
Step-by-Step Countertop Herb Garden Setup
Ready to get started? Let’s walk through the physical setup. Even if you aren’t a “DIY person,” this process is surprisingly satisfying.
Preparing Your Countertop Herb Garden Setup
- Sanitize: Clean your pots with mild soap to ensure no lingering bacteria from previous plants.
- Drainage Layer: If your container doesn’t have a saucer, add an inch of aquarium gravel to the bottom. This creates a “sump” area where excess water can sit without rotting the roots.
- Soil Prep: Use a well-draining indoor potting mix. Some experts recommend a “103 mix” (topsoil, compost, and sand) to mimic Mediterranean conditions.
- Hydrate: Dampen the soil slightly before planting so it’s like a wrung-out sponge.
Check out our diy-indoor-herb-planter-ideas for creative ways to use household items like utensil caddies or tea sets for your garden.
Planting Seeds and Starters
We often recommend beginners start with seedlings (starters) rather than seeds. Why? Because starters give you an immediate 3x yield compared to those plastic grocery store clamshells for roughly the same price.
If you do use seeds, plant them about 1/4 inch deep. Use a germination dome (or a bit of plastic wrap) to keep humidity high until you see green sprouts (usually 7-14 days). When transplanting starters, inspect the roots. If they are circling the bottom of the pot, gently loosen them before burying the plant at the same depth it was in its original container. We’ve detailed this process in how-to-start-an-indoor-herb-garden and planting-herbs-in-small-spaces.
Essential Care: Lighting, Water, and Nutrients
This is the “make or break” phase. Your countertop herb garden setup is a living ecosystem that depends entirely on you for its “weather.”
Optimizing Light for Your Countertop Herb Garden Setup
Most culinary herbs are sun-worshippers. They need at least 6 to 8 hours of bright light daily. A south-facing window is the gold standard, but in the winter or in darker apartments, natural light often isn’t enough.
This is where LED grow lights come in. Modern full-spectrum LEDs are incredibly efficient. For optimal growth, your herbs need about 14-16 hours of supplemental light.
- The Ratio: A 70:30 red-to-blue light ratio is ideal for leaf production.
- The Distance: Keep lights 6 to 12 inches above the plants.
- Rotation: Rotate your pots weekly. Plants naturally lean toward the light; rotating ensures they grow straight and strong rather than “leggy.”
For more on window placement, see planting-herbs-in-kitchen-windows and our general indoor-herb-garden-setup-tips.
Watering and Fertilizing Schedules
The #1 killer of indoor herbs is overwatering. Use the finger test: stick your finger one inch into the soil. If it feels dry, water it. If it’s still damp, wait a day.
For nutrients, pots have a limited amount of soil. Herbs in a countertop herb garden setup should be fertilized lightly every 2-4 weeks with an organic, water-soluble fertilizer. In the winter months (November through January), plants grow slower, so you can skip the fertilizer until February. Explore our tips for low-maintenance-indoor-herb-planting to keep your chores to a minimum.
Troubleshooting and Harvesting for Success
Once your garden is growing, you need to know how to maintain it. Think of yourself as a tiny landscape architect.
How to Harvest to Encourage Regrowth
Don’t be afraid to cut your plants! Frequent harvesting actually makes them grow thicker and bushier.
- The One-Third Rule: Never harvest more than one-third of the plant at a time. This ensures the herb has enough “solar panels” (leaves) to keep growing.
- Where to Snip: Always cut just above a leaf node (the spot where new leaves emerge from the stem).
- Timing: Harvest in the morning when the essential oils are at their peak for the best flavor.
Regular pruning prevents your herbs from flowering (bolting), which can make the leaves taste bitter. See our guide on the best-indoor-herbs-for-cooking for specific harvesting tips for each variety.
Common Problems and Fixes
- Leggy Growth: This means your plant is “reaching” for light. Move it closer to the window or lower your grow light.
- Yellowing Leaves: Usually a sign of overwatering or poor drainage.
- Pests: Even indoors, you might see aphids or spider mites. A simple spray of water and a drop of organic dish soap usually does the trick.
- Mold: Ensure good airflow. Don’t crowd your pots too closely together.
For apartment dwellers with limited space, we have specific advice on indoor-herb-garden-for-apartments and vertical-herb-gardening-indoors.
Frequently Asked Questions about Countertop Herb Gardens
How much does a countertop herb garden cost?
A basic setup with a few pots, soil, and starters can cost as little as $20-$30. High-end smart hydroponic systems can range from $70 to $150. However, when you consider that a single basil plant can produce the equivalent of $50 worth of store-bought herbs over its lifetime, it’s a high-return investment. For more budget-friendly tips, see our diy-indoor-herb-planter-ideas-2.
Can I grow herbs from seeds in these systems?
Absolutely! While it takes more patience, growing from seed allows you to try exotic varieties you won’t find at the local nursery. Just be sure to keep the seeds moist and warm during the germination phase. We cover more on this in diy-indoor-herb-planter-ideas-3.
How do I clean my countertop herb garden?
For hydroponic systems, you should sanitize the water reservoir once a month to prevent algae. A mild solution of water and a teaspoon of food-grade hydrogen peroxide works wonders. For soil-based pots, simply wipe down the saucers and remove any fallen, dried leaves from the soil surface to prevent mold. Check out indoor-gardening-kits-for-beginners-2 for more maintenance hacks.
Conclusion
At FinCapitaly, we believe that sustainable living starts in the heart of the home: the kitchen. A countertop herb garden setup isn’t just about saving money on groceries—though that’s a nice perk—it’s about the joy of connecting with nature and the unmatched flavor of ingredients harvested seconds before they hit the pan.
Whether you’re snipping mint for a refreshing mojito or adding fresh basil to your Sunday sauce, your indoor garden will bring a bit of life and flavor to your daily routine. Ready to expand your green thumb? Explore more indoor gardening tools and start your journey toward a fresher, more flavorful kitchen today!
